

Key takeaways
- Best all-around technical choice: MSR Lightning Ascent. Its lightweight aluminum frame, full-length traction rails, and aggressive binding system suit steep, icy, and mixed terrain. Choose the 22-inch model for lighter loads or firm trails, and add the optional flotation tails when carrying more weight in soft snow.
- Best value for maintained trails: MSR Evo Trail. The molded composite deck is durable, relatively compact, and easy to use. Its traction is adequate for rolling terrain, but it is less confidence-inspiring than a full-length metal rail on steep hardpack.
- Best for comfortable recreational hiking: Tubbs Flex RDG. The flexible composite deck and easy-entry binding are appealing for occasional users and moderate trails. It is a practical choice when comfort and simple adjustments matter more than minimum weight.
- Best for deep snow and backcountry travel: Atlas Helium series. The lightweight construction and optional tails provide a useful balance between packability and flotation. Check the exact model’s load range before choosing a short version for powder.
- Best for variable, technical conditions: TSL Symbioz Hyperflex. Its flexible frame and articulated design can feel natural on uneven ground, while the binding system offers a secure connection. It is usually more expensive than basic recreational snowshoes.
The best snowshoes are sized by your total loaded weight, snow conditions, and terrain—not by height alone: choose a shorter, lighter pair for packed trails and climbing, or add length and flotation for deep powder and a heavier winter pack.
Our top picks

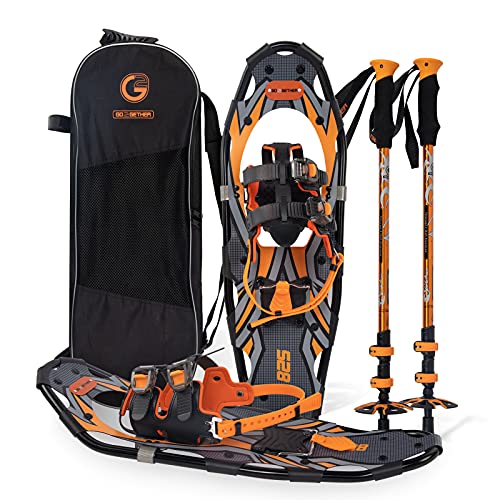


As an Amazon Associate we earn from qualifying purchases at no extra cost to you. Ratings are shown as listed on Amazon.
Best snowshoes by use case
- Best all-around technical choice: MSR Lightning Ascent. Its lightweight aluminum frame, full-length traction rails, and aggressive binding system suit steep, icy, and mixed terrain. Choose the 22-inch model for lighter loads or firm trails, and add the optional flotation tails when carrying more weight in soft snow.
- Best value for maintained trails: MSR Evo Trail. The molded composite deck is durable, relatively compact, and easy to use. Its traction is adequate for rolling terrain, but it is less confidence-inspiring than a full-length metal rail on steep hardpack.
- Best for comfortable recreational hiking: Tubbs Flex RDG. The flexible composite deck and easy-entry binding are appealing for occasional users and moderate trails. It is a practical choice when comfort and simple adjustments matter more than minimum weight.
- Best for deep snow and backcountry travel: Atlas Helium series. The lightweight construction and optional tails provide a useful balance between packability and flotation. Check the exact model’s load range before choosing a short version for powder.
- Best for variable, technical conditions: TSL Symbioz Hyperflex. Its flexible frame and articulated design can feel natural on uneven ground, while the binding system offers a secure connection. It is usually more expensive than basic recreational snowshoes.
How to match snowshoe length to your loaded weight
Snowshoe size charts normally refer to total weight: your body, winter clothing, boots, water, food, and backpack. A 175-pound hiker carrying a 25-pound winter pack should shop for a 200-pound load, not a 175-pound load.
| Typical total load | Firm or packed trails | Deep or unconsolidated snow | Practical recommendation |
|---|---|---|---|
| Up to 150 lb / 68 kg | 20–22 in | 22–25 in | Shorter snowshoes improve maneuverability |
| 150–200 lb / 68–91 kg | 22–25 in | 25–30 in | Most adults fall in this versatile range |
| 200–250 lb / 91–113 kg | 25–30 in | 30–36 in | Prioritize flotation and a strong binding |
| Over 250 lb / 113 kg | 30 in or a rated extension | 36 in or more, if terrain allows | Check the manufacturer’s maximum load carefully |
These are starting ranges rather than universal rules. Dry powder requires more surface area than wet, settled snow. In dense forest, a long snowshoe can catch on branches and make tight switchbacks awkward. If you regularly alternate between packed routes and powder, a model with removable flotation tails is often more useful than buying an oversized pair for every trip.
Head-to-head: metal-frame versus composite snowshoes
Aluminum-frame snowshoes
Aluminum frames generally provide a narrow, efficient shape and pack well against a backpack. Models such as the MSR Lightning Ascent use a metal frame paired with a deck and prominent traction rails. They are especially effective on sidehills and hard snow because the rails can engage instead of relying only on crampon teeth beneath the foot.
The trade-off is price and potential wear at joints, decking attachments, and binding pivots. Inspect the frame after a hard impact, particularly if you step onto exposed rock or frozen logs.
Composite-deck snowshoes
Composite models, including the MSR Evo Trail and Tubbs Flex RDG, are often less expensive and can be forgiving for beginners. Their broad molded decks provide dependable flotation for their length, and the material is not as vulnerable to cosmetic dents as a thin metal frame.
They may be bulkier when strapped to a pack, and the underside can slide more on steep traverses if the traction system is designed primarily for recreational trails. Composite decks also deserve inspection for cracks after repeated cold-weather impacts.
Bindings: the feature that determines whether snowshoes feel secure
Look for bindings that can be operated with gloves and that hold the boot without excessive pressure. A binding should keep the foot centered while allowing the heel to lift naturally during walking.
- Rubber or stretch bindings: comfortable and quick to enter, with good tolerance for different boot shapes. They may age faster when stored damp or exposed to sunlight.
- Ratchet bindings: precise and easy to retighten, though small buckles can collect ice and may be fiddly with thick gloves.
- Boa-style cable systems: fast and evenly tensioned, but a damaged cable or dial can be harder to repair in the field.
- Pivoting bindings: help the tail drop away from the snow as you step, reducing the effort of lifting each shoe. Too much pivot can feel unstable while descending.
Try the binding over your actual winter boots, not lightweight footwear. Leave enough adjustment range for insulated boots and gaiters, but avoid compensating for a poor fit by overtightening.
Traction and terrain performance
For flat, packed trails, modest underfoot crampons and a tail traction bar are usually sufficient. For icy slopes, prioritize full-length side rails, a pronounced toe crampon, and a heel lift. A heel lift reduces calf strain on sustained climbs by keeping the ankle in a more comfortable position.
On descents, traction matters just as much as flotation. Place the whole foot deliberately rather than relying on the front crampon alone. In deep powder, flotation and balance become the limiting factors; an aggressive crampon cannot prevent a short snowshoe from sinking to the deck.
| Feature | Packed trail | Deep powder | Steep or icy terrain |
|---|---|---|---|
| Preferred length | 20–25 in | 25–36 in | 20–25 in when load permits |
| Most important feature | Low weight and easy binding | Deck area or flotation tails | Rails, crampons, and heel lift |
| Ideal frame | Composite or narrow aluminum | Wide composite or tailed aluminum | Aluminum with full-length traction |
A practical buying decision matrix
| Your situation | Best direction | Why |
|---|---|---|
| First pair, occasional use, modest budget | 22–25 in composite model | Simple, durable, and adequate for groomed or rolling trails |
| Frequent day hikes with climbs | 22–25 in aluminum model with heel lift | Better traction and less weight during repeated ascents |
| Winter backpacking with variable snow | Model with optional tails | One pair can cover firm trails and heavier loads |
| Limited storage or frequent travel | Shorter, narrow snowshoe with a compact binding | Easier to strap to luggage or a pack |
| Mostly steep, icy routes | Technical aluminum model with rails | Edge control is more valuable than maximum flotation |
Cost and ownership realities
Entry-level snowshoes commonly cost about $100–$180 per pair, capable recreational models about $180–$300, and technical or ultralight models roughly $300–$450 or more. If a $240 pair is used 12 times each winter for three winters, the equipment cost is about $6.67 per use before accessories. That can make a more durable binding worthwhile if it prevents early replacement.
The parts most likely to wear are crampon teeth, binding straps or cables, pivot bushings, and deck attachment points. Snowshoe poles, gaiters, and waterproof boots also affect performance, but they do not compensate for an incorrectly sized snowshoe.
Setup and maintenance steps
- Fit each binding indoors. Put on the boots and adjust until the foot is centered without crushing the boot.
- Test the release and retention. Lift the heel and walk several steps. The snowshoe should follow the boot without twisting sideways.
- Check both shoes before every trip. Look for loose rivets, cracked composite, damaged rails, and bent crampon teeth.
- Remove snow after use. Knock off ice outdoors, then rinse away salt or grit with clean water if needed.
- Dry completely before storage. Hang the pair in a cool, ventilated place. Do not store wet bindings compressed or leave them in a hot vehicle.
- Transport the teeth safely. Use a protective bag or strap the shoes together with crampons facing inward to protect clothing and pack fabric.
The most common buying mistake is choosing based on body weight alone while ignoring the pack and snow depth. Add your fully loaded weight, select the shortest size that provides enough flotation for your usual conditions, and prioritize traction when your routes include steep or icy terrain.

Write Your Review
No reviews yet. Be the first to share your experience!