

Key takeaways
- 3/8 inch: Suitable for light cardio, stretching, and bodyweight workouts when the subfloor is already smooth and sturdy.
- 1/2 inch: The practical minimum for most home gyms containing cardio equipment and moderate dumbbell use.
- 3/4 inch: A strong all-around choice for free weights, benches, kettlebells, and a compact rack.
- 1 inch: Better for concentrated loads, frequent lifting, and rooms where additional vibration reduction is useful.
- 1.5 inches or more: Usually unnecessary for ordinary home-gym flooring; use specialized platforms or crash pads for serious dropping.
The best gym flooring tiles for most home gyms are 3/4-inch interlocking rubber tiles: they protect floors from heavy equipment, reduce vibration, resist compression, and remain stable during strength or cardio workouts.
Choose 1/2-inch rubber for a general-purpose workout room, 1-inch rubber for a rack and free-weight area, and EVA foam only for low-impact exercise such as stretching, yoga, mobility work, or light bodyweight training. The right choice depends less on appearance than on impact, equipment weight, odor tolerance, and how often you will move or clean the tiles.
Our top picks
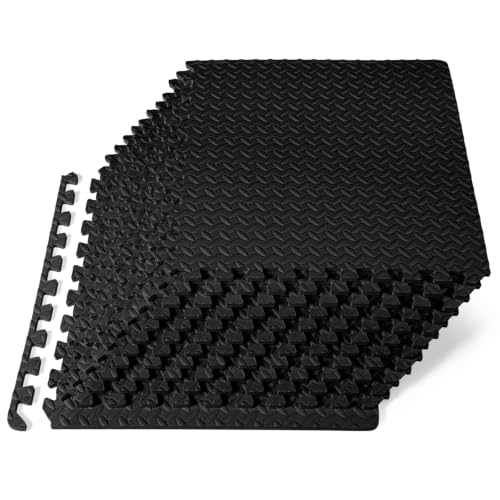


As an Amazon Associate we earn from qualifying purchases at no extra cost to you. Ratings are shown as listed on Amazon.
Best gym flooring tiles by home-gym situation
| Home-gym situation | Best tile type | Recommended thickness | Why |
|---|---|---|---|
| Yoga, stretching, and mobility | High-density EVA foam | 3/8 to 1/2 inch | Comfortable under knees and elbows; easy to cut and install |
| Cardio machines and general exercise | Interlocking rubber | 1/2 inch | Stable under equipment feet and more durable than foam |
| Dumbbells, kettlebells, and moderate lifting | Rubber tiles or dense rubber rolls | 1/2 to 3/4 inch | Balances impact protection, price, and ease of installation |
| Power rack, barbell training, or Olympic lifting | Dense rubber tiles with separate lifting pads | 3/4 to 1 inch | Better resistance to dents and concentrated loads |
| Apartment or upstairs room | Dense rubber with an underlayment where appropriate | 3/4 to 1 inch | Helps reduce vibration, although it cannot eliminate impact noise |
Rubber versus foam: the important trade-off
Rubber tiles
Rubber is the better material for weights, treadmills, ellipticals, exercise bikes, benches, and power racks. It handles concentrated pressure without permanently flattening as quickly as ordinary foam. It also provides more predictable footing when shoes, sweat, or equipment movement are involved.
Most home-gym rubber tiles are made from recycled rubber granules bonded with polyurethane or from more uniform virgin rubber. Recycled rubber is often less expensive and highly durable, but it can have a stronger odor and a speckled appearance. Virgin rubber generally has a more consistent surface and may have less odor, but the price is commonly higher.
Rubber is not completely soundproof. It can reduce vibration and protect a subfloor, but dropping a loaded barbell still creates impact noise, especially in an upstairs room. For repeated barbell drops, use dedicated lifting platforms or thick drop pads rather than relying on thin wall-to-wall tiles.
Foam tiles
EVA foam is soft, light, inexpensive, and comfortable for floor exercises. It is also easy to carry upstairs and simple to replace one section at a time. Those advantages make it useful for a stretching area or a temporary workout space.
Foam is a poor choice beneath heavy racks or benches. Narrow equipment feet can compress it, causing the machine to rock or leaving permanent depressions. Foam can also tear when equipment is dragged across it. Even high-density EVA foam is intended primarily for low-impact activity, not repeated weight drops.
How much thickness do you need?
Thickness improves impact absorption, but it does not automatically make a tile suitable for heavy lifting. Density, surface hardness, and how the load is distributed matter just as much. A dense 3/4-inch rubber tile can outperform a soft 1-inch foam tile beneath a bench or rack.
- 3/8 inch: Suitable for light cardio, stretching, and bodyweight workouts when the subfloor is already smooth and sturdy.
- 1/2 inch: The practical minimum for most home gyms containing cardio equipment and moderate dumbbell use.
- 3/4 inch: A strong all-around choice for free weights, benches, kettlebells, and a compact rack.
- 1 inch: Better for concentrated loads, frequent lifting, and rooms where additional vibration reduction is useful.
- 1.5 inches or more: Usually unnecessary for ordinary home-gym flooring; use specialized platforms or crash pads for serious dropping.
For a rack, measure the footprint of the uprights and place them on rigid rubber rather than soft foam. If you deadlift, a platform with thicker rubber sections under the plates protects the floor more effectively than making the entire room extremely thick.
Tile size, coverage, and cost
Common interlocking tiles measure 24 by 24 inches, giving 4 square feet per tile. Larger 36 by 36-inch tiles cover 9 square feet each and reduce the number of seams, but they are heavier and more awkward to position. Smaller tiles are easier to replace and transport but create more visible joints.
Use this calculation before ordering:
Room area ÷ tile area = minimum tile count. For example, a 10-by-12-foot room is 120 square feet. With 2-by-2-foot tiles, 120 ÷ 4 equals 30 tiles. Add 5 to 10 percent for cuts, damaged pieces, and future replacements, so ordering 32 to 33 tiles is more realistic.
| Tile specification | Typical coverage | Approximate weight | General market range |
|---|---|---|---|
| 3/8-inch EVA foam, 24 x 24 inches | 4 sq. ft. | 1.5 to 3 lb. | $10 to $25 per tile |
| 1/2-inch rubber, 24 x 24 inches | 4 sq. ft. | 20 to 30 lb. | $20 to $45 per tile |
| 3/4-inch rubber, 24 x 24 inches | 4 sq. ft. | 28 to 40 lb. | $30 to $60 per tile |
| 1-inch rubber, 24 x 24 inches | 4 sq. ft. | 35 to 50 lb. | $40 to $80 per tile |
These are broad market ranges, not guarantees. Delivery, edge pieces, flooring density, recycled-rubber content, and custom colors can change the total substantially. Rubber tiles also become expensive to ship because a 120-square-foot room may require well over 700 pounds of material.
Interlocking fit and installation details
A good interlocking system should close fully without raised corners or visible gaps. Loose-fitting teeth allow tiles to shift during lateral movements, while overly tight teeth can make installation and future replacement frustrating. Before buying, check whether the product includes border and corner pieces; exposed puzzle edges look unfinished and can catch on shoes or equipment wheels.
Install tiles in five steps
- Inspect the subfloor. Remove grit, protruding screws, and moisture. Rubber follows uneven surfaces, so it will not hide major cracks or humps.
- Acclimate the tiles. Leave them in the room for at least 24 to 48 hours if the manufacturer recommends it. Temperature changes can affect fit and odor.
- Plan the layout. Center seams where possible and keep full tiles beneath racks and machines. Put cut pieces against walls.
- Join tiles without stretching them. Press the seams together with your hands or a soft mallet. Stretching can create gaps later.
- Let rubber air out. Ventilate the room before placing equipment if the smell is strong. Do not cover the flooring immediately with airtight sheets.
Do not glue interlocking tiles unless the flooring manufacturer specifically allows it. Floating tiles are easier to repair, while adhesive can trap moisture and make a single-tile replacement difficult.
Odor, cleaning, and long-term ownership
Rubber odor is the most common ownership complaint, particularly with recycled-rubber products. Odor usually declines with ventilation, but a sealed basement or small room may retain it longer. Avoid assuming that “low odor” means odor-free; request material and emissions information when sensitivity is a concern.
Clean rubber with a vacuum or soft broom followed by diluted mild soap and water. Remove moisture rather than leaving the surface wet. Avoid petroleum solvents, harsh degreasers, and excessive disinfectant, which can attack binders or leave the surface slippery. Foam can usually be wiped with mild soap, but it should not be soaked because water may enter the seams or underside.
The first parts to wear are usually exposed puzzle edges, areas under narrow equipment feet, and zones where plates are repeatedly dropped. Rotate movable machines occasionally if the flooring permits it, use protective cups under exceptionally narrow feet, and replace damaged tiles rather than allowing torn edges to spread.
Bottom line
For the widest range of home-gym uses, select dense 3/4-inch interlocking rubber tiles. Choose 1/2-inch rubber when the room is mainly for cardio and moderate training, 1-inch rubber or a dedicated platform for heavier lifting, and EVA foam only when comfort and portability matter more than load resistance. Prioritize density, a secure interlocking fit, manageable odor, and replacement availability over color or thickness alone.

Write Your Review
No reviews yet. Be the first to share your experience!