

Key takeaways
- Use one pendant over a small round table, a compact peninsula, or an island shorter than about 60 inches.
- Use two pendants over most 60–84-inch islands. This is the easiest arrangement to center and wire.
- Use three pendants over islands longer than about 84 inches, especially when the island is used for food preparation.
- Use a linear pendant when you want one continuous fixture over a long island or rectangular dining table.
The best kitchen pendant lights are the ones whose width, hanging height, brightness, finish, and installation method fit the surface and ceiling beneath them—not simply the ones with the most attractive shade.
Our top picks
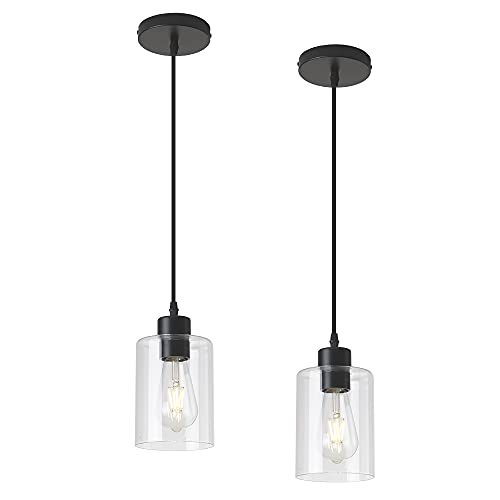


As an Amazon Associate we earn from qualifying purchases at no extra cost to you. Ratings are shown as listed on Amazon.
Quick picks by kitchen situation
| Kitchen situation | Best pendant type | Useful starting specification | Why it works |
|---|---|---|---|
| Small island or peninsula | One compact dome or globe | 10–14 inches wide; 800–1,200 lumens | Provides task light without crowding the work surface |
| Standard 6–7-foot island | Two medium pendants | 12–16 inches wide each; 800–1,500 lumens each | Balances light across the preparation area |
| Large 8–10-foot island | Three small or medium pendants | 10–14 inches wide each; 600–1,200 lumens each | Avoids a single oversized visual mass and reduces dark spots |
| Dining table beside the kitchen | One broad lantern, globe, or linear fixture | 24–36 inches wide; 1,500–3,000 total lumens | Creates a centered pool of light over the table |
| Low ceiling | Shallow flush-mount-style pendant | Under 10 inches of vertical body height | Maintains head clearance while adding visual interest |
| High or vaulted ceiling | Long-stem or adjustable-cord pendant | 18–30 inches of adjustable drop | Brings the light source down to a useful working height |
How to choose the right pendant size
For an island, begin with the island’s length rather than the room’s total size. A practical rule is to leave about 12 inches of clearance from each end of the island and at least 6 inches between neighboring shades. For example, a 72-inch island can usually accommodate two 14-inch pendants:
72 − 12 − 12 − 6 = 42 inches of usable spacing.
Two 14-inch shades fit comfortably within that zone, with the electrical boxes centered around 18–20 inches from each end. For three pendants, choose narrower shades—approximately 10–12 inches wide—so the installation does not look crowded.
As a second check, add the diameters of all the pendants and compare that total with the island length. The combined width generally looks balanced when it occupies roughly 50–70% of the island’s length, leaving visible breathing room at both ends.
Single pendant or multiple pendants?
- Use one pendant over a small round table, a compact peninsula, or an island shorter than about 60 inches.
- Use two pendants over most 60–84-inch islands. This is the easiest arrangement to center and wire.
- Use three pendants over islands longer than about 84 inches, especially when the island is used for food preparation.
- Use a linear pendant when you want one continuous fixture over a long island or rectangular dining table.
Getting the drop length right
The bottom of a pendant over an island usually works best 30–36 inches above the countertop. Measure from the counter surface, not from the floor. This height illuminates the work area while preserving sight lines across the kitchen.
For a dining table, 30–34 inches above the tabletop is a useful starting range. A broad shade can hang slightly lower because it distributes light across a larger area, while a narrow, exposed-bulb pendant may need to hang higher to prevent glare.
Ceiling height changes the calculation. With an 8-foot ceiling and a 36-inch-high island, a pendant bottom at 32 inches above the counter leaves 28 inches to the ceiling. With a 10-foot ceiling, the same target height leaves a much longer gap above the fixture, so an adjustable rod or cord may be needed to prevent the light from appearing lost overhead.
Keep pendants out of the main walking path. If a fixture extends beyond the island edge, account for taller household members and avoid placing it where someone can easily walk into the shade.
Brightness, bulb type, and glare
Kitchen pendants should supplement the room’s general lighting rather than carry the entire lighting load. For an island used for chopping or reading recipes, aim for approximately 70–100 lumens per square foot on the work surface, with dimming available for evening use. A 6-by-3-foot island has 18 square feet, so a rough target is:
18 × 70–100 = 1,260–1,800 lumens at the island.
That total might come from two pendants rated at 700–900 lumens each. The rest of the kitchen may still require recessed, track, under-cabinet, or ceiling lighting.
- Opaque metal shades: Direct light downward and reduce eye-level glare; good for food preparation.
- Opal glass: Produces softer, more even light and hides the bright filament or LED source.
- Clear glass: Preserves a light visual profile but can expose the bulb and create glare.
- Open cage shades: Suit industrial or transitional kitchens, but need a frosted or warm-dimmable bulb if the source is visible.
Choose bulbs around 2700–3000K for a warm residential appearance. If the kitchen has cool white task lighting, select compatible color temperature across the fixtures rather than mixing noticeably yellow and blue sources.
Finish and style: match the room, not every appliance
Black, aged brass, bronze, chrome, nickel, and painted colors can all work in a kitchen. The most durable-looking choice is usually one that repeats an existing detail: cabinet hardware, faucet metal, window hardware, or a nearby dining fixture.
Matching every metal exactly is not essential. A kitchen can combine, for example, brushed nickel hardware with aged brass pendants if the shapes and undertones are deliberate. Avoid adding a third highly reflective finish unless the room already has enough visual separation.
For a small kitchen, clear or opal glass and slim stems make the room feel less obstructed. In a large open-plan kitchen, a substantial dome, lantern, or sculptural globe can define the island as its own zone.
Installation requirements that affect the buying decision
Before ordering, check whether the fixture is compatible with the existing ceiling box, dimmer, ceiling height, and wiring layout. A pendant may be light enough for a standard electrical box, but a heavy glass or multi-light fixture may require a properly supported box or reinforcement.
- Confirm the fixture’s total weight, especially for large glass shades or clustered pendants.
- Check whether the canopy covers the existing junction box and any ceiling marks.
- Measure the supplied cord or stem; some fixtures cannot be shortened enough for low ceilings.
- Verify that the bulb base, wattage limit, and LED compatibility match the intended lamp.
- Use a compatible dimmer. Some LEDs flicker or fail to reach low brightness with unsuitable controls.
- For new wiring, multiple pendants, or a ceiling box in the wrong location, use a licensed electrician.
When replacing a single ceiling light with two or three island pendants, the electrical layout is often more complicated than the fixture installation itself. A professional can locate boxes symmetrically and confirm that the ceiling structure can support them.
Durability and cleaning realities
Kitchen lighting collects grease, dust, and airborne cooking residue faster than fixtures in bedrooms or hallways. Glass shades are easy to wipe but show fingerprints; textured metal hides minor marks but can trap dust; fabric shades are attractive over dining areas but are less convenient near a range.
Clean the fixture only after switching off the circuit and allowing bulbs to cool. Use a soft, barely damp cloth for painted or plated metal, and follow the manufacturer’s instructions for glass. Do not spray cleaner directly into a socket, canopy, or seam.
The parts most likely to need attention are LED bulbs, dimmer compatibility, cord grips, and finish surfaces near the cooking area. Integrated LED pendants can look sleek, but replacing the light source may require servicing the entire fixture or replacing a proprietary module. Replaceable bulbs are often easier to maintain over many years.
Best choice by budget and installation experience
| Budget or experience | Recommended approach | Typical 2026 market range | Main trade-off |
|---|---|---|---|
| Value-conscious renter | Single replaceable-bulb pendant with adjustable cord | $40–$120 | May have a thinner finish or less substantial canopy |
| DIY homeowner replacing an existing fixture | Two matching medium pendants with simple canopies | $150–$500 for the pair | Requires accurate box placement and careful alignment |
| Design-focused remodel | Hand-finished metal, opal glass, or coordinated linear fixture | $500–$1,500 or more | Higher material cost and potentially longer lead times |
| Low-maintenance priority | Sealed opal-glass fixture with replaceable LED bulb | $100–$400 | Less decorative detail than an open or fabric shade |
Common mistakes to avoid
- Choosing a pendant by room size while ignoring island length.
- Hanging the fixture from the ceiling rather than measuring from the countertop or tabletop.
- Using bright clear bulbs at eye level without a diffuser or dimmer.
- Installing three wide pendants where two would provide better spacing.
- Forgetting that a vaulted ceiling may need a sloped-ceiling adapter.
- Using fabric or porous shades where grease and steam are frequent.
Final buying checklist
Measure the island or table, select the number and width of pendants, calculate the desired bottom height, and estimate the required lumens before comparing finishes. Then confirm weight, bulb or LED serviceability, dimmer compatibility, canopy dimensions, and the available cord or stem length. The best kitchen pendant lights make the work surface brighter and the room more cohesive without creating glare, head clearance problems, or a difficult installation.

Write Your Review
No reviews yet. Be the first to share your experience!